
By LocalAds.ie Editorial Team
How to Take Listing Photos That Show Your Item Clearly
Use simple daylight, an honest shot sequence and privacy checks to create clear classified-ad photos that help Irish buyers assess an item before contacting you.
Published 7 September 2026 - 14 min read
Clear listing photographs are evidence, not decoration. They let a buyer identify the item, judge its condition, understand its size and decide whether a journey or message is worthwhile. You do not need a studio or expensive camera. A clean phone lens, soft daylight, a plain setting and a repeatable shot list will usually produce a more useful advert than dramatic filters or one carefully hidden angle.
The aim is accuracy. Photograph the actual item being sold, include every component and make wear as easy to see as the attractive features. The Competition and Consumer Protection Commission explains that misleading advertising can include false, deceptive or incomplete information. Businesses must ensure an item matches descriptions or samples, while private buyers are responsible for careful checks. Honest images reduce uncertainty for either type of transaction.
Prepare the item before opening the camera
Remove ordinary dust, empty drawers and arrange loose parts, but do not clean so aggressively that you damage a finish or temporarily disguise a fault. Fit only the accessories included in the sale. If an appliance is photographed with a stand, cable or attachment that is not included, remove it or state the exclusion prominently in the description. Charge devices enough for a safe demonstration and disconnect dangerous equipment before handling it.
Inspect the item yourself under good light. Note dents, stains, cracks, repairs, missing covers, worn edges and intermittent functions before deciding the shots. This prevents an accidental omission and helps the written condition description agree with the images. Take any identifying or ownership photograph needed for your private records separately from the images you will publish.
Choose soft, consistent daylight
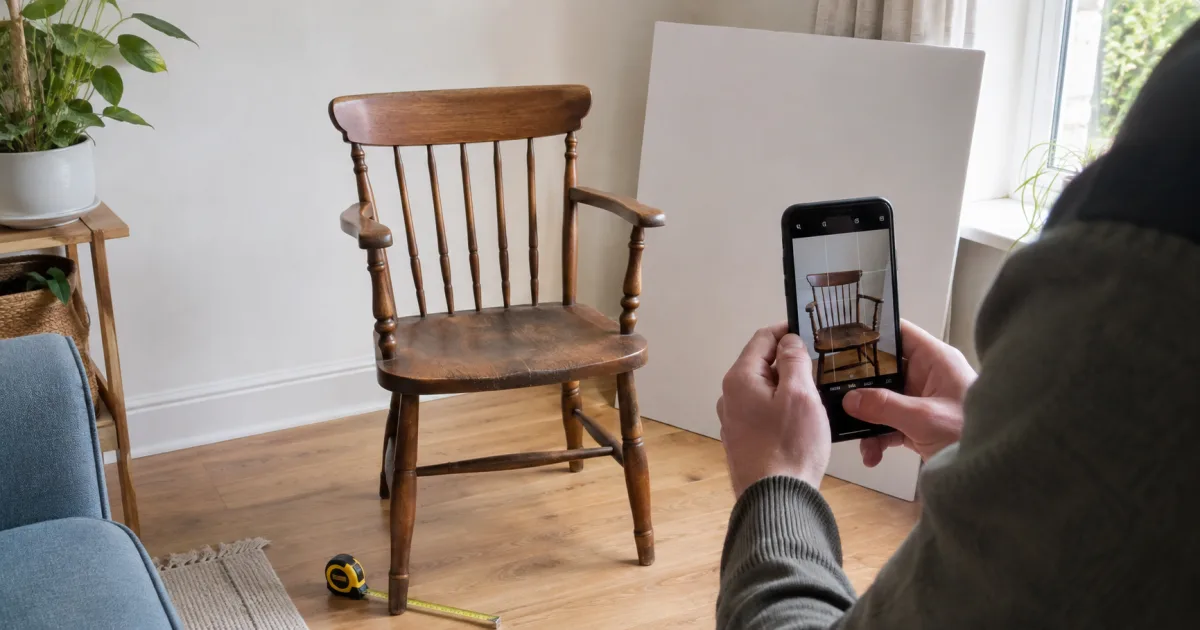
Place the item near a bright window or photograph outdoors in open shade when weather and safe handling allow. Face the item towards the light so texture and edges remain visible. Harsh direct sun creates deep shadows and bright reflections; a thin curtain can soften it. A large piece of white card opposite the window can lift the darker side without changing the item’s colour.
Switch off strongly coloured lamps if they mix orange artificial light with blue daylight. Avoid photographing a reflective screen directly opposite a window. Move your position slightly until glare clears while the surface remains recognisable. Do not use a coloured bulb, beauty filter or dramatic night mode to make worn fabric, paint or wood appear different from reality.
Make a simple, private background
A plain wall, clear floor or neutral sheet helps the object separate from its surroundings. Move clutter rather than blurring it later. Check every edge of the frame for post, prescriptions, identity cards, school names, family photographs, computer screens, calendars and house numbers. Mirrors, glossy appliances and switched-off televisions can reveal a face or a room behind the camera.
Irish Data Protection Commission guidance notes that photographs can be personal data where a person is identified or identifiable, and that information may identify someone indirectly through context. Apply the practical principle of data minimisation: publish only what a buyer needs. Crop out unrelated people, vehicle registration plates and precise address clues before uploading, and obtain appropriate permission before including anyone else.
Set up the phone for reliable results
One-minute phone setup
- Wipe the lens with a clean microfibre cloth.
- Use the normal rear camera rather than digital zoom where possible.
- Turn on the grid to keep walls and furniture straight.
- Select the item on screen to set focus and adjust exposure only enough to preserve detail.
- Hold the phone with both hands, brace your elbows or use a stable support.
- Use the same orientation for the whole set, preferably landscape when the marketplace card is wide.
- Check that the camera saves a full-resolution original before photographing everything.
Step closer instead of pinching to digital zoom, but leave enough space around the item to show its complete outline. A very wide camera can bend furniture legs and exaggerate room size; use the normal lens and keep the phone level. Take two versions of important views and inspect them at full size for blur before moving the item.
Build the advert around one honest first photograph
The first image should answer what is being sold. Show the entire item from its most informative angle, with all edges visible and no text banner covering it. Use a representative view, not a sealed retail box when the actual product is used, or a close-up that hides its overall condition. If the sale is a bundle, the first photo should show the complete bundle laid out clearly.
Fill most of the frame without cutting off feet, handles or attachments. Keep the camera approximately level with the item’s centre. Photograph a chair from a height that shows its seat and structure, not from the ceiling; photograph a small object straight on and then from above where relevant. The thumbnail should remain understandable on a phone screen.
Use a repeatable shot sequence
A dependable listing photo order
- Complete front or three-quarter hero view.
- Opposite side and rear view.
- Top, underside or interior where condition matters.
- Controls, ports, joints, fasteners and working surfaces.
- Maker, model, size or care label with private identifiers concealed when appropriate.
- Included accessories arranged so each can be counted.
- Every defect in context, followed by a close detail.
- Measurement photographs for dimensions that decide fit.
- Safe proof of operation when a still image can show it accurately.
Keep the camera distance and lighting consistent so one view does not appear to show a different colour or condition. Buyers should be able to mentally turn the object. If the platform limits image count, combine related accessories in one orderly photograph, but never use a collage that makes small defects impossible to inspect.
Photograph defects twice
First show where the defect sits on the item; then take a close image that shows its shape and severity. A close-up of a scratch without context can make its size impossible to judge, while a distant image can hide it. Put a ruler beside damage when scale is relevant, without covering the area. Describe the same defect in words so a buyer does not need to infer what the photograph means.
Do not reduce exposure to hide stains, polish over a crack, remove damage with an editing tool or position a cushion over worn upholstery. If a flaw cannot be photographed accurately, explain why and invite an in-person inspection. The CCPC advises second-hand buyers to examine items for faults and ask about history and condition; a seller can make those checks more meaningful by supplying complete evidence.
Show scale with real measurements
Do not rely on a mug, coin or person as the only size reference. Photograph a tape measure against the actual width, height and depth, then type the measurements into the description. For furniture, include seat height, doorway-relevant maximum dimension and dismantled size. For clothing, photograph flat measurements without stretching fabric. Buyers need numbers even when the tape is visible because perspective can distort an image.
Keep colours and materials accurate
Compare the saved photo with the item in the same light. If automatic processing has made navy look black or cream look white, try a different neutral background and softer light. Mention colour variations in the description when screens may reproduce them differently. Show grain, weave, gloss and wear with an angled detail, but avoid sharpening that creates false texture.
Take category-specific evidence
Furniture needs front, back, sides, underside, joints, fabric, feet and access-relevant dimensions. Open drawers and doors safely, and show internal stains or repairs. Appliances need the full exterior, interior, plug and cable, controls, rating or model label, shelves and accessories. A light or display can support a limited claim, but one illuminated photograph does not prove every programme or function.
For phones and laptops, show the powered screen, casing edges, cameras, ports, keyboard and included charger after removing accounts and notifications. Do not publish full serial numbers, IMEI numbers, Wi-Fi details or recovery information. Clothing benefits from front, back, fabric, care label, closures, hems and flaws plus exact flat measurements. Tools need guards, chuck or blade area, cable or battery contacts, model label and accessories; never stage a dangerous action merely to create a photograph.
Bicycles need both complete sides plus frame joints, drivetrain, brakes, tyres and size markings. Children’s equipment requires labels, harnesses, wheels, brakes and any age or standard information without making unsupported safety claims. For vehicles, hide registration plates in public images where appropriate and remove documents, permits and home-location clues. Category photographs supplement, rather than replace, competent inspection.
Use original photos of the actual item
A manufacturer image may explain a model, but it cannot establish the condition or contents of your used example. Lead with your own current photographs. Do not copy another seller’s images or use an AI-generated product image as though it depicts the item for sale. If a reference diagram is genuinely necessary and you have permission to use it, label its purpose clearly and keep actual-item images dominant.
Edit only to improve legibility
Reasonable edits include straightening, cropping irrelevant background, modest exposure correction and removal of private information. Keep an unedited original. Do not reshape the object, whiten yellowed plastic, restore missing paint, clone out wear, add accessories or replace the background in a way that changes scale or edges. If privacy requires a blur, apply it only to the private detail and confirm it cannot be recovered from another uploaded image.
Order and caption the final set
Put the overall view first, then move logically around the item before labels, accessories, measurements and faults. Remove near-duplicates and blurred frames. Write useful alternative text when the publishing form provides it: identify the item, view and meaningful condition, such as ‘rear of oak dining chair showing repaired left joint’. Avoid keyword stuffing and phrases such as image of; alternative text should help someone understand what that specific photograph contributes.
Export common, web-friendly files at a resolution large enough to zoom without uploading enormous originals unnecessarily. Check every image after upload because automatic cropping can cut off defects or labels. View the finished advert on a narrow phone screen and a larger display, and verify that the first image, order and orientation still make sense.
Avoid these common photo mistakes
- One distant photograph for an item with several sides.
- A dark silhouette caused by shooting directly into a window.
- Flash glare hiding a screen, label or polished surface.
- Portrait and landscape images mixed without checking automatic crops.
- Accessories in the frame that are not part of the sale.
- A defect shown only after several attractive photographs or not shown at all.
- Filters, background replacement or retouching that changes apparent condition.
- Private mail, faces, number plates or reflections left in the background.
- Stock or copied images presented as the actual used item.
- Measurements visible only at an unreadable angle.
A ten-minute workflow for one ordinary item
Clean and inspect the item, choose the plainest suitable area and move it near soft window light. Clear private details, wipe the phone lens and capture the hero view. Walk around for the opposite, rear and functional views. Add model, accessory, measurement and defect photographs. Review at full size for blur and privacy, make only light corrections, then upload in a logical order and compare every image with the description.
Before publication, ask whether a buyer could identify the exact item, see every included part, locate every known fault and judge whether it fits. Then ask whether the photographs expose anything unrelated to the sale. Retake a weak image instead of trying to rescue it with heavy editing. A complete, accurate set saves repetitive questions and gives serious buyers a better basis for inspection.
Final clear listing photo checklist
- The actual item is clean, safely prepared and fully visible.
- The first image identifies exactly what the price buys.
- Soft, consistent light preserves real colour and texture.
- Front, rear, sides and functional areas are covered.
- Included accessories can be identified and counted.
- Every known defect has both context and close detail.
- Measurements are shown and also written in the description.
- No face, document, address clue, plate or account detail is exposed.
- No stock image, filter or edit misrepresents condition.
- Files remain sharp after upload and automatic cropping.
- Alternative text describes the purpose of each important image.
- The image set and written description agree before publication.
Good listing photography is straightforward reporting. Show the whole item, then prove the details a buyer would inspect in person. When the light is neutral, defects are visible, measurements are clear and the background is private, the advert becomes easier to trust—and the resulting enquiries are more likely to come from buyers who understand what is actually for sale.
Tags
More from Seller guides
10 min read
What Can I Sell Online in Ireland? A Room-by-Room Guide
A practical way to find saleable items around your home, decide what is worth listing and turn a clear-out into useful local ads.
11 min read
How to Sell Multiple Items Online Without Losing Track
A simple listing workflow for an Irish home clear-out, move or stock reduction, including batches, photos, pricing and buyer handovers.
9 min read
How to Prepare a Used Item for Sale Online: 30-Minute Checklist
Clean, test, measure and photograph a used item efficiently so buyers can understand its condition before they contact you.